

If your kitchen feels outdated but a complete remodel isn’t in the budget, painting your kitchen cabinets can make a dramatic difference. Freshly painted cabinets can brighten the space, modernize your home’s style, and give your kitchen an entirely new look—all without the expense of replacing cabinetry.
While painting cabinets is a manageable DIY project, achieving professional-looking results requires more than simply applying a coat of paint. Proper preparation, the right tools, and patience throughout the process are what create a durable finish that stands up to daily use.
In this guide, we’ll walk you through every step of painting kitchen cabinets, from preparing the surfaces to caring for your newly painted finish. If you decide the project is more than you want to tackle, the experts at Bath Kitchen & Tile are always here to help you determine whether painting, refinishing, or replacing your cabinets is the best investment for your home.
Kitchen cabinets occupy a large portion of your kitchen’s visual space. Over time, they can become worn, faded, or simply look outdated as design trends change. Painting them offers several advantages:
However, painting isn’t always the right solution. Cabinets with severe water damage, warped doors, broken frames, or failing laminate may be better candidates for replacement. If you’re unsure, Bath Kitchen & Tile can evaluate your cabinetry and recommend the best option.
Gathering quality supplies before you begin will make the project much smoother and improve your final results.
Investing in premium primer and cabinet-specific paint is well worth the extra cost. Cabinet surfaces experience constant contact, moisture, grease, and cleaning, so they require products designed for durability.
Preparation is the single most important factor in achieving a finish that lasts.
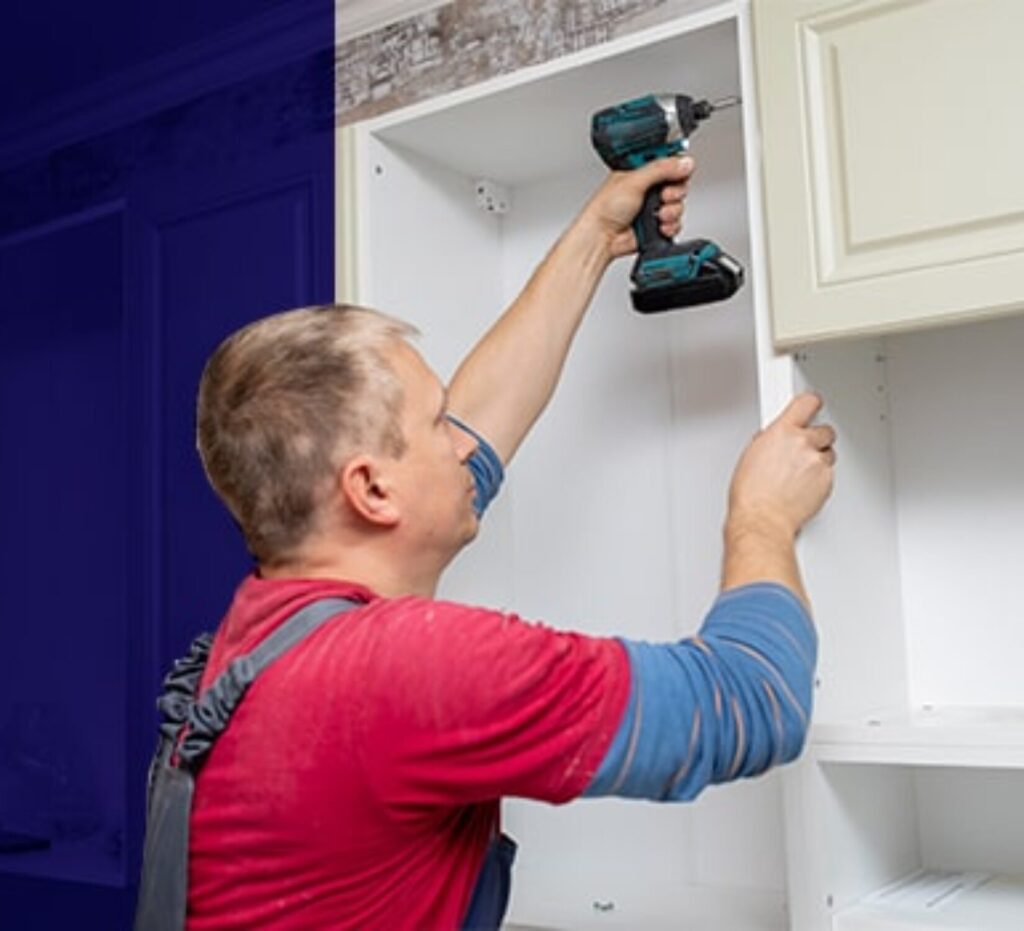
Begin by removing all cabinet doors, drawer fronts, hinges, knobs, and pulls. Label each door and its corresponding hardware so everything goes back in its original location during reassembly.
Keeping screws and hinges in labeled bags helps eliminate confusion later.
Remove everything from the cabinets before sanding or painting. Dust from sanding can easily settle inside cabinets, making cleanup much more difficult.
Kitchen cabinets accumulate years of cooking grease, food residue, fingerprints, and dust. Even cabinets that appear clean often have an invisible layer of grease that prevents primer from bonding correctly.
Use a quality degreaser and thoroughly wipe every surface. Pay special attention to cabinets near the stove, where grease buildup is typically heaviest.
Allow all surfaces to dry completely before moving on.
Inspect the cabinets for dents, scratches, or unused hardware holes.
Fill imperfections with wood filler and smooth them with a putty knife. Once dry, sand the repaired areas until they’re flush with the surrounding surface.
Small repairs made now will produce a much cleaner finished appearance.
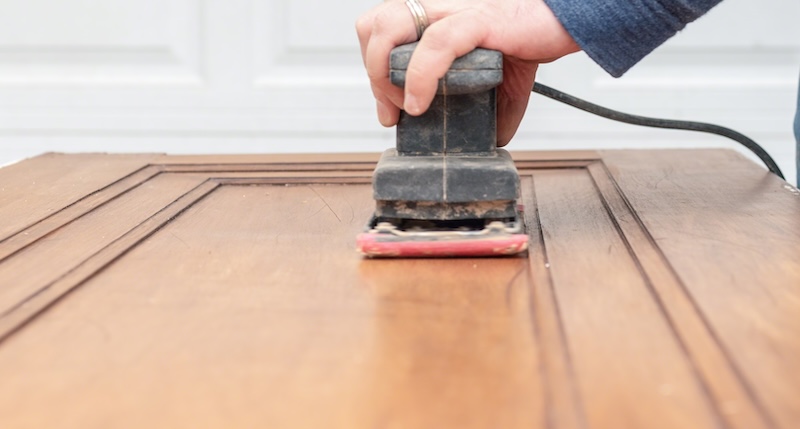
Sanding creates the slightly rough surface needed for primer to adhere properly.
Contrary to popular belief, you don’t need to remove all of the existing finish. The goal is simply to dull glossy surfaces and create enough texture for good adhesion.
Use 100–150 grit sandpaper for the initial sanding.
Pay extra attention to:
Once sanding is complete, vacuum away all dust before wiping every surface with a tack cloth or damp microfiber cloth. A clean surface ensures the primer goes on smoothly without trapping debris.
Painting cabinets can get messy quickly.
Before opening the primer or paint, protect surrounding surfaces by:
Many DIY painters use sawhorses or elevate doors on small blocks so the edges can be painted without sticking to the work surface.
Taking time to prepare your workspace makes cleanup much easier and helps produce better results.
Primer creates the foundation for a smooth, durable finish. Different cabinet materials require different primers.
A high-quality stain-blocking primer seals the surface while preventing stains or wood tannins from bleeding through the paint.
Use a bonding primer specifically designed to adhere to slick surfaces. Skipping this step can lead to peeling paint within months.
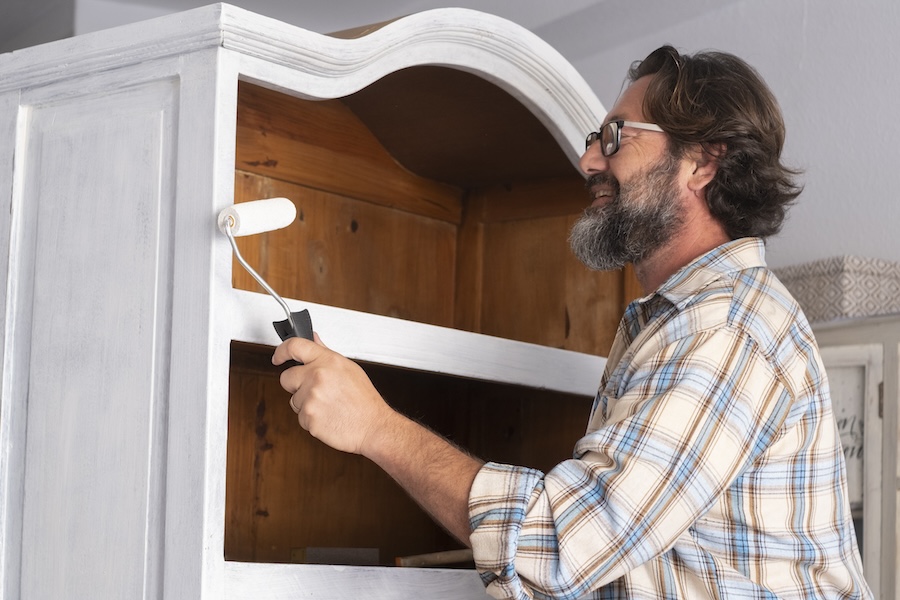
Use an angled brush for detailed profiles and inside corners. For large flat panels, switch to a foam or microfiber roller to create a smoother finish with fewer brush marks.
Apply thin, even coats rather than heavy ones. Once the primer dries, lightly sand the surface using 220 grit sandpaper to remove any rough spots or raised grain. Wipe away all sanding dust before painting.
Now comes the exciting part—adding color.
Cabinet-specific paints are formulated to resist chipping, scratching, moisture, and repeated cleaning.
Popular finish options include:
Paint recessed or detailed areas first using an angled brush.
Immediately follow with a foam or microfiber roller on flat surfaces to create an even finish. Work methodically, maintaining a wet edge to avoid lap marks. Allow the first coat to dry completely according to the manufacturer’s instructions.
After the first coat has dried, lightly sand using 220 grit sandpaper. This removes minor imperfections while helping the second coat bond more effectively. Always wipe away sanding dust before continuing.
A second coat provides complete coverage, richer color, and improved durability.
Avoid applying thick coats in an attempt to speed up the process. Multiple thin coats always produce a smoother finish than one heavy application.
Professional-looking cabinets are built through patience, not shortcuts.
One of the most common mistakes homeowners make is reinstalling cabinet doors too soon.
Paint may feel dry within a day, but that doesn’t mean it has fully cured.
Dry time refers to when paint can be lightly touched.
Cure time refers to when the paint reaches its maximum hardness and durability.
Depending on the product, curing may take several days or even a few weeks.
Whenever possible:
Giving the finish adequate curing time significantly increases its longevity.
Many cabinet painting projects fail because of preventable errors.
Avoid these common mistakes:
Taking your time throughout the process will reward you with a finish that looks professionally completed.
Painting cabinets can be a rewarding project for homeowners who enjoy DIY work and have the time to dedicate to careful preparation and multiple days of drying and curing.
However, professional cabinet refinishing may be the better choice if:
In some cases, replacing cabinets altogether offers greater long-term value, especially when updating the layout or improving storage functionality.
At Bath Kitchen & Tile, we help homeowners evaluate every option—from repainting and refinishing to complete cabinet replacement. Our experienced team can recommend the best solution based on your budget, style preferences, and the condition of your existing cabinetry.
Painting your kitchen cabinets is one of the most impactful home improvement projects you can undertake. With careful preparation, quality materials, and attention to detail, you can dramatically refresh your kitchen without the cost of a complete remodel.
If you’re ready to update your kitchen but aren’t sure whether painting or replacing your cabinets is the right choice, contact Bath Kitchen & Tile. Our team can help you create a kitchen you’ll love for years to come with expert guidance, quality craftsmanship, and customized remodeling solutions. To get started, contact us today!
Yes. Painting is one of the most affordable ways to refresh your kitchen without replacing your cabinets.
Cabinet-specific acrylic enamel or alkyd paints provide the best durability and smooth finish.
Yes. Light sanding helps the primer and paint adhere properly and creates a longer-lasting finish.
Use both. A brush works best for corners and detailed areas, while a foam or microfiber roller creates a smoother finish on flat surfaces.
Most cabinets require two coats of paint over one coat of primer for even coverage and durability.
Wait at least 24 to 48 hours before reinstalling doors and hardware, and allow several days for the paint to fully cure before heavy use.
Yes, but you’ll need to use a high-quality bonding primer designed specifically for laminate surfaces.
Most DIY cabinet painting projects take three to five days, depending on drying and curing times.
Use a soft cloth with mild soap and water. Avoid abrasive cleaners or scrubbing pads that can damage the finish.
If your cabinets have structural damage, severe water damage, or peeling laminate, replacement is often a better long-term investment.